Evernote web clipping plus todo lists as read-later tool
There are often things you read in web, which are actually interesting, but just come in the wrong moment. Directly before a meeting, or when actually searching for something completely unrelated.
It is still important to keep track of these things, ideally in a way that is archived, so even when the blog post in question disappears from the web, you can have access to this knowledge. Web clipping and read-later tools come to help.
This article will discuss a way to first use the Evernote web clipper efficiently for this purpose. Then, to not forget clipped items, it will look into ways to automate the workflow from web clipping an article to a reminder in your task management tool, and the right tagging to be able to actually retrieve older clipping.
Read later functionality
Read later functionality refers to the function to copy contents of a website, article or blogpost to a private location for archiving purposes. Usually, this would be something, which you want to read at a later point, maybe because you currently have no time for it. It could also be something interesting for future reference or a future project, which has not yet started.
The idea is archiving: The internet is very vivid, any many articles available today might be already not accessible tomorrow, maybe because of a defunct server or a bankrupt company. If clipping knowledge to an own, private location, it is in your own power.
There are actually many tools, which are dedicated to this use case. Pocket, Instapaper, and more, come to mind. Unfortunately, creating this habit of clipping things to Pocket might introduce yet another tool to your life.
Another tool means, another tool to forget. Things might get clipped somewhere, to be forgotten. If you are already using Pocket or a similar tool daily, and are happy with it, you don’t need to read further. Otherwise, let’s look at an alternative.
Evernote and web-clipping
Evernote is a popular tool for note taking, but it can do so much more. One of its greatest features is the web-clipper. While similar tools might have similar features, the Evernote web clipper is extremely well implemented and a software on its own.
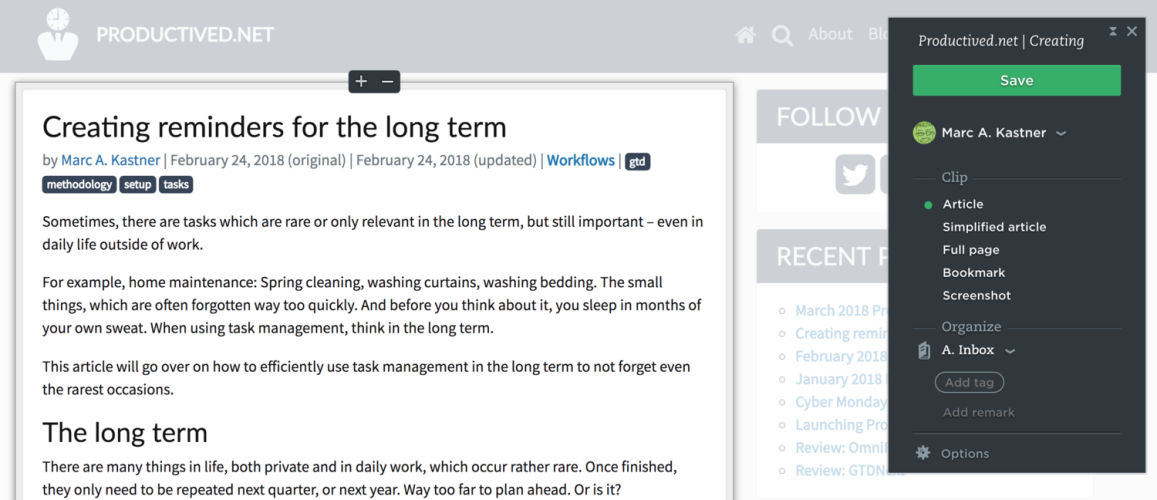
Using the Web clipper, which is a browser extension available for most popular browsers, you can clip various things on any website, directly to an Evernote notebook.

One can switch between options for Article, Simplified article, Full page, Bookmark or Screenshot. The option decides about the resulting comments’ content.
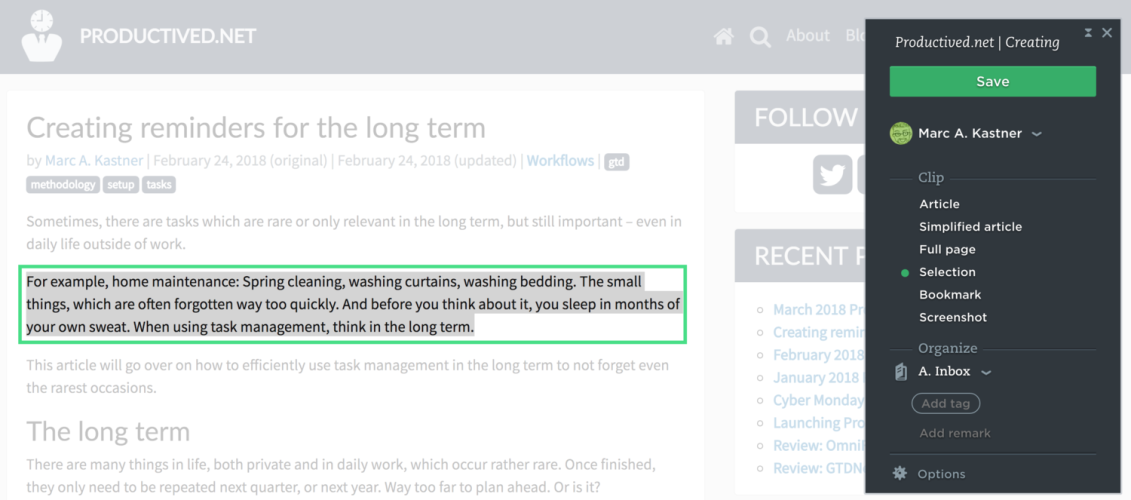
It is also possible to mark a text passage and clip it directly to the software.

If using an article or simplified article, the Web clipper will try to figure out the layout of the website. Ideally, it will try to just get the article, and skip unnecessary layout like a sidebar or navigation menu. The simplified option will also remove additional layouting like fonts or colors, resulting in plain text.
If a screenshot is clipped, it will result in a JPG or PNG of the website, rather than an actually editable text format.
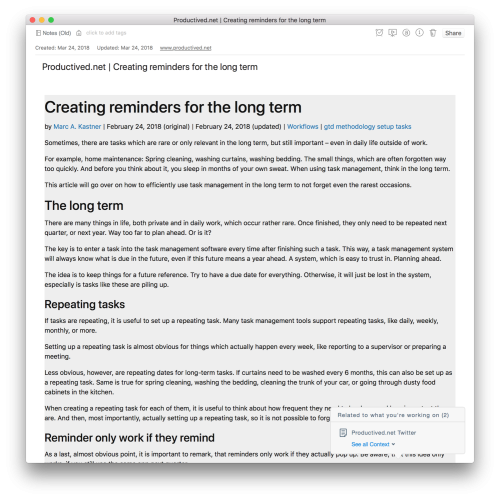
A resulting note of a clipped article will look like below:

Half the work is done: An interesting article is clipped to a notebook for future reference. You can open it at any time: whether it is just the next morning at the breakfast table while browsing yesterdays news, or actually a year later when the original article might not even be available anymore.
Use good tagging for future reference
To find a Web Clip, even after a longer period of time, the search capabilities plus good tagging might help. As a matter of fact, everything which is not tagged or titled correctly, can be treated as lost in the archive, especially if it is not indexable text, but mostly consisting of images.
I can not stress enough, how often I have not found something old, because I could not remember the right wording, and there have been no tags in place.
While clipping it to a notebook, you can select the target notebook as well as already add tags and a remark. The tags might be useful to actually find the clip later on. The tags could be something like webclip, but also something related to the content like productivity, blog post. Depending on your organization system, you could also add urgent, or not-yet-read, or similar. A note can have an unlimited amount of tags, so make sure to tag everything, which will be helpful to find this article later on.
On the right side of Evernote, there is a sidebar, which shows you all tags. Using it, it is easy to filter notes for different topics or urgencies. Tags can be nested using drag and drop, to sort them thematically.
Advanced: Automatically creating a task from the note
A good read-later tool should actually be read later. While it is helpful to actually have interesting articles clipped, one needs to make sure to actually go into the notebook and regularly clean up, read articles, and do something with the clipped contents.
One option is to create a habit about checking Evernote daily. If you are already using Evernote for notes or other things, that might be already the case. Otherwise, if it is more a file cabinet of ideas and only visited irregularly, a reminder might help.
There is an article on sending emails to the task management system. On a similar note, one can combine this technique with many other tools. The latter sections of the article discussed, how to setup IFTTT with Pocket and a task management tool of choice, to automatically create new tasks from new Pocket items. The same process works with Evernote.
- Find out the e-mail address of your task management tool. OmniFocus, Things, MyLifeOrganized, Todoist. Many tools have a dedicated function to automatically create tasks by sending an e-mail to a special e-mail address like productived.SECRET@taskmanagement-tool.com.
- Create an account at IFTTT or Zapier, which are automation tools to combine many services with another.
- Create an automation workflow. The input tool would be Evernote: For every new note. The output tool would be an e-mail. For example, Google Mail can be connected to these services to be able to create automated e-mails. The To field of the e-mail would then be the task-management tool of choice. Some tools, like Todoist, can directly be connected to these automation tools, but most other ones need the workaround of sending an e-mail.
The article mentioned above goes in much more detail, including a step-to-step guide with screenshots, if this short enumeration has been too quick for your taste.
The setup can be limited to a certain notebook. Therefore, you could create a read-soon and an archive clips notebook, and only set up the task forwarding for the former one, while a little less important clips go the latter one. This is a way to avoid noise in your task management tool.
Conclusion
The Evernote web clipper is a great tool which can be use for archiving interesting articles, blog posts and more. Clip a lot, and everything, which you might need for future reference.
With it, Evernote becomes a great tool for read-later purposes. Everything which is too long at a glance, but definitely important in a future context, can be clipped to a relevant notebook.
The Web clipping tool is well implemented to make the clipping process as smooth as possible. It will automatically figure out the main content of the website and clip it for you to a newly created Evernote note in the background.
When doing so, keep in mind to tag it with relevant tagging to make sure that it is actually retrievable in the future. If you need a reminder, automation services like IFTTT or Zapier can be used to automate the creation of a reminder task for a newly added read-later item.
Disclosure: This post may contain affiliate links. This means I may make a small commission if you make a purchase.
About me

Marc
I am a lecturer in field of computer science. I am interested in task- and knowledge management. Sometimes, I blog on productivity workflows, apps, and other related non-work stuff I'm working on.
See Also
An Overview on Automation
When using a multiple of productivity apps, the number of inboxes can get overwhelming. An email from a supervisor and a related task in a …
Read More...How to select the best to-do list tool to boost productivity
When looking at options for to-do lists, there are so many tools. How to choose the right one? What are the best options for which kind of …
Read More...Creating OmniFocus projects from templates and calendar events
Today I want to showcase one of my most favorite automation workflows I am regularly using on my iPad. When preparing regular events or …
Read More...