Review: GoodNotes 4

Disclaimer! I received this app for free by Time Base Technology Limited (Thank you!)
Note, that I am not paid for the review, and I am free to write whatever I want, or even decide not to review the app at all. My reviews target neutral conclusions based on my usage, to let you draw your own judgments if this app is right for you.
When digitally taking handwritten notes, it is easy to lose track of notebooks and documents. Stuff can simply get lost in large digital archives, and are hard to be tracked. Unlike typed documents, most applications won’t allow for indexing handwritten documents.
GoodNotes comes to rescue. With a great text detection engine which even supports handwritten input, it can make all handwritten notes searchable. Even better: Exported documents have this information attached, so things can be filed away into other applications with peace of mind. This makes GoodNotes a great solution for taking handwritten notes in a paperless environment.
I take a look at this app and analyze how it can compete to other applications, how it is implemented and if it is worth your money.
Summary of GoodNotes 4
Handwritten detection in many languages which is even exportable. Smooth inking engine with many features.
No audio recording features. Slow development.
Free for restricted feature set, $7.99 for full unlock
Tested platforms: macOS iPadOS iOS
This review tested the following versions: iPadOS: 4.12.13, macOS: 1.1.15.

Overview
GoodNotes is one of the most popular note taking apps for the iPad and in the first places of the productivity category of the App Store in many countries.
It comes with an advanced set of tools for inking, a smooth Ink Engine without any lag, and a great killer-feature: text detection of handwritten input (so-called OCR), and that in many languages.
GoodNotes has been on the shelves for a long time, and GoodNotes 5 has been promised for years, but it does not seem to come very soon. Nonetheless, the fourth version brings almost everything imaginable.
The app is available for iOS and Mac, albeit arguably the iOS version being the main application and the Mac tool some kind of viewer or companion app.
Sync
GoodNotes comes with multiple ways of syncing and backing up data. For device-to-device sync, it uses iCloud. All notebooks can be put to your iCloud, where they will sync automatically and appear on all your other devices.
Unfortunately, the syncing seems unpolished. I had many issues, from slow syncing, over duplicate files, up to corrupted files and even data loss in two notebooks. Additionally, there has been quite some negative iTunes reviews related to syncing issues, mainly non-syncing or slow-syncing.
There have, however, been many bugfix releases related to this, and the recent changelogs let me to believe that this is a thing of the past. The current version seems to work as expected, as I had no further data loss or significant speed issues. Regular backups are still recommended, as they are for any app.
Which brings me to the next point: On top of the iCloud sync, there is a function for automated backup. It could also be used for syncing purposes, especially in combination with other applications. After activating the auto-backup, notebooks are regularly pushed to your Dropbox, Box, OneDrive, or Google Drive.
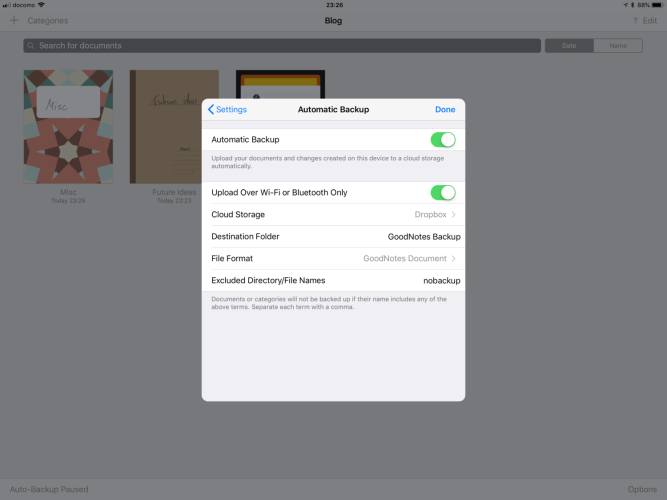
Depending on the settings, the resulting files will be either in a proprietary format, or PDFs. The backup function seems reliable, and I had no obvious issues with it.
Pricing
On either platform, GoodNotes comes as a flat one-time purchase for $7.99. There is no trial, but also no in-app purchases or tier pricing. The Mac and iOS versions need to be bought separately, if wanting to use both. The iOS version is universal, so it will run on both the iPad and iPhone with a single purchase.
iPad app
In the following, I will first go over the iPad version of GoodNotes, as it is arguably the main app of this note taking suite.
It has full support for the Apple Pencil, and is really made to be used with it. In the settings, there are also options for some other smart styluses: Adonis, Pencil by FiftyThree, Pogo Connect, and Wacom. They have not been tested in this review, so your milestone may vary.
One way or another, it is really recommended to have some kind of stylus if wanting to use this application to its full potential. The review is written from the point of view of using an Apple Pencil.
The application has some settings for palm rejection. This means, it will try to distinguish between real input and just your palm laying on the screen while writing. This is less of an issue if you use the Apple Pencil, as then the iPad will implicitly try to do that (as far as I know), but especially helpful for third party styluses or finger input.
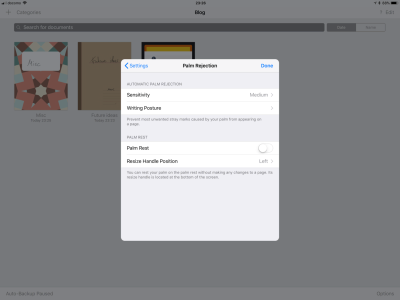
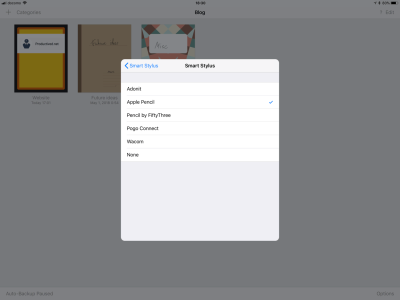
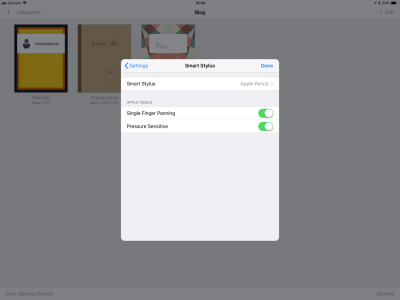
Below, there are further sections on the iPhone and Mac versions. These versions seem to be foremost companion apps which can be used to view notebooks written on the iPad. More on that later.
Notebooks
Notebooks are the central unit, as everything in GoodNotes is pages within notebooks.
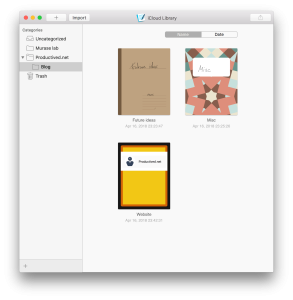
The central screen showing all notebooks is somewhat similar to a shelf of all available notebooks.
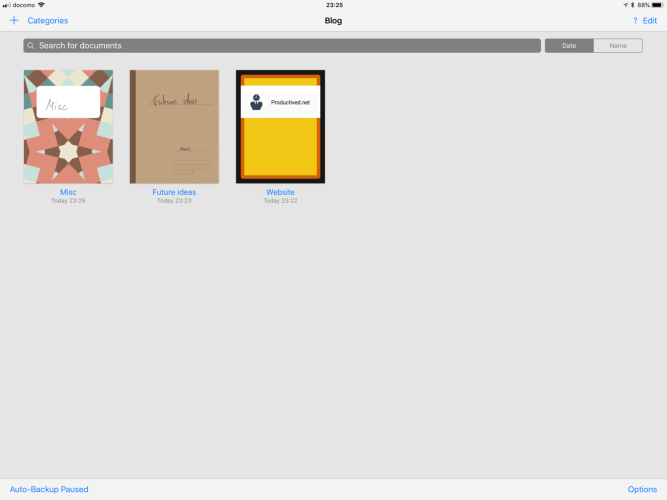
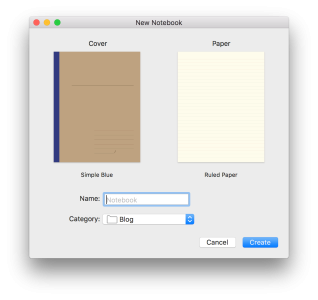
It is a grid-layout showing the front page of each existing notebook. New notebooks can be created by clicking the + sign in the top left corner.
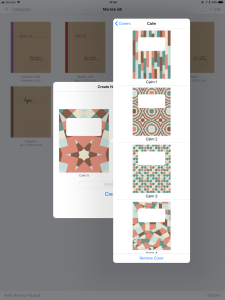
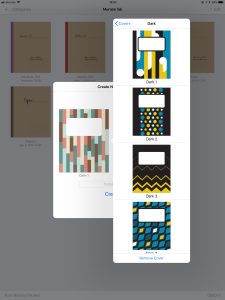
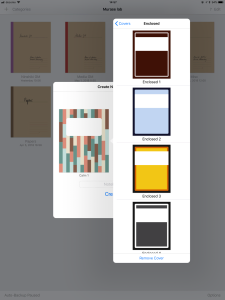
A new notebook gets an identifying name, a front page and a page layout. For both front pages and page layouts there are dozens of options in different styles, themes, and colors. A newly created notebook has two pages:
- The first page is the front page, which also serves as an icon on the overview screen showing all notebooks. Annotations made on this first page also show up in the notebooks’ icon, so this is a way to individualize the appearance of each notebook.
- The second page is the previously selected page layout, may it be a plain page, a ruled page or squared page. It is the first real page to do annotations and handwriting on.
If reaching the last page, for example, being on the second page of a newly created notebook, and then continuing swiping to the side, GoodNotes will proceed to create yet another page. The number of pages is unlimited, as it will always create another page when reaching the end of a notebook.
Using the + symbol in the menu, it is also possible to add new pages of other page layouts, or importing PDFs into the current notebook (these will get to be new pages, more on that below).
When clicking on a notebook, it will be opened and ready for annotating and such. GoodNotes supports opening multiple notebooks at the same time. While a split screen or two-page layout in landscape is unfortunately not available, the application uses tabs to allow quickly jumping between multiple open notebooks. It works similar to web tabs in a browser like Google Chrome or Firefox.
Page layouts
GoodNotes comes with various options for page layouts, in different styles, themes, and colors. All expected things are available: Plain pages, ruled pages, squared pages, etc. Each with different widths and sizes. Additionally to these standard layouts, there are also various other options like graph papers, music sheets, and Cornell papers.
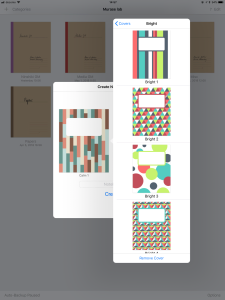
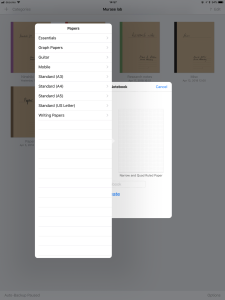
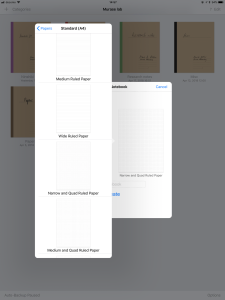
For page sizes, there is everything from A3 to A5. There is also US Letter size. This makes sure, that exported PDFs or prints will be in the correct sizing, and that there are no scaling issues. This is helpful, if you still need to print things from time to time, maybe for archiving or simply sharing ideas with colleagues. The right page size will ensure that everything printed will look exactly like within the app.
New page layouts can be added, too. Virtually any existing page can be used as a template for new pages. Therefore, you could use imported images, imported PDFs, pre-annotated pages, or similar, as a template for creating new pages.
On a side note: All pages in GoodNotes have a defined size, may it be A4, US Letter, or something else. There are no options for endless canvas like in OneNote or other competitors. Also, there is only one page on the screen at a time, you can’t write over the borders of a page, and pages are not adjunct (e.g. they don’t share an edge where you can draw over).
Categorizing
If having many notebooks, it may get confusing to find the right one.
To get some extra structure into the list, GoodNotes allows filtering by categories. Each notebook can be put in one category. Using a dropdown menu in the top menu, you can filter between Uncategorized, Trash, or any self-created categories.
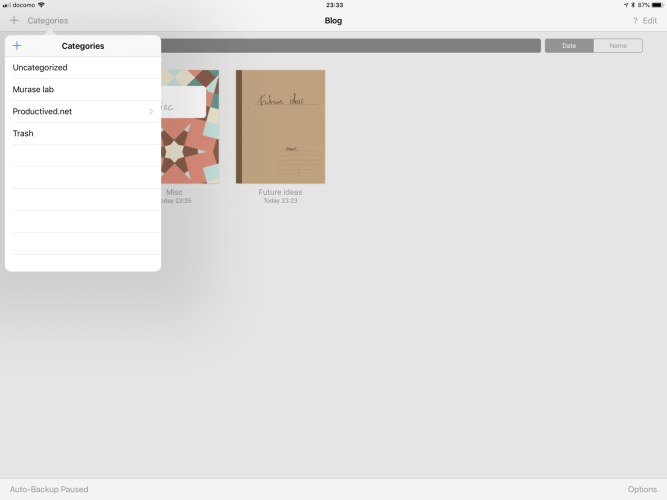
Using this, you could have multiple categories for different projects, jobs, or areas of life.
If this is still not enough, the app also allows for Master Categories, which is a folder of categories (e.g. A master category can have multiple categories, which can have multiple notebooks.)
Feel free and go crazy with these three layers of abstraction to sort your notes.
Importing
External documents can be imported into GoodNotes. There are direct options from cloud storages like Dropbox, Box, Google Drive or OneDrive, but it also supports accessing the Files.app (iOS 11), so anything compatible with that can be used as a source. Additionally, pictures from the camera or Photos.app can also be imported.
There is no separate file management for documents. Everything is a notebook. If a document, like a PDF, is imported into GoodNotes, there are basically two options:
- First, it can get part of an existing notebook. This means, all pages of the PDF are appended or included in between other pages of the notebook. If being in a notebook, you can import above or import below, which means that an imported PDF will be added before or after the current page.
- Second, creating a new notebook from the PDF. This is done from the overview showing all notebooks. An imported document will show up on the shelf of notebooks and just blend in as yet another notebook, despite being based on a PDF. Even then, you can add new notebook pages to it, as it behaves identical to other notebooks.
On a small side note, importing images works pretty similar. An image can either be a new page of an existing notebook, a new notebook, or part of a page (a movable object within a page.)
Annotations
When opening a notebook, the annotation screen pops up. The majority of the screen is filled with the current page of a notebook.
You can interact with the page by using the standard multi-touch gestures using your fingers. If connected to the Apple Pencil, the fingers won’t do any accidental writings, so you can freely use your fingers to navigate the page.
Swiping over the borders of a page brings you to the neighboring pages - the pages are in horizontal order, so the previous page is on the left, and the next page on the right. If being on the last page, another swipe will just create a new one.
There are two main menu bars: The first is the utility bar, where you can switch between different pen modes, import pictures and documents, have undo/redo buttons, and so on. The second is the tab bar. It appears, if multiple notebooks are open at the same time. It can be used for quick-jumping between multiple notebooks.
On my screenshots, these two bars are in the bottom of the screen. But in most other screenshots on the web, they are probably on the top. The reason is this: Based on your preference, which is probably closely related to whether you are left-handed or right-handed, you can move these UI elements from the top to the bottom. I love this feature! (I’m lefty by the way.)
Pens and highlighters
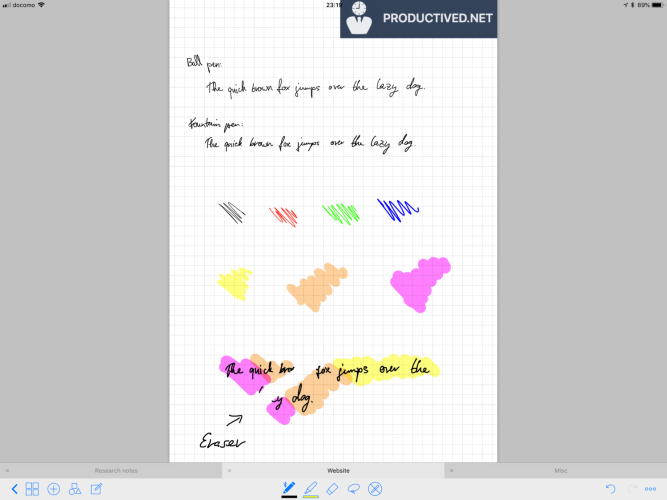
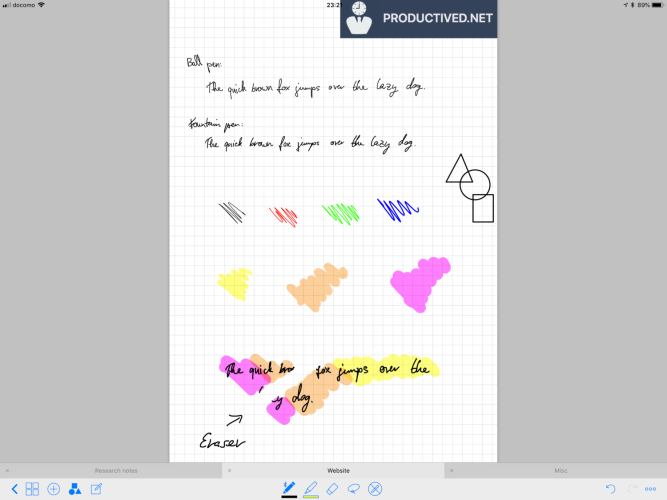
GoodNotes supports two kinds of regular pens. There is a fountain pen, and a ballpoint pen. You can switch between either in the settings. Toggling this, the appearance will slightly change. The fountain pen tries to emulate a real fountain pen which has a different thickness based on the angle, creating this typical cursive look. The ballpoint on the other hand has constant thickness.
If double pressing the pen button, a small menu pops up, where you can select the thickness and color of strokes.
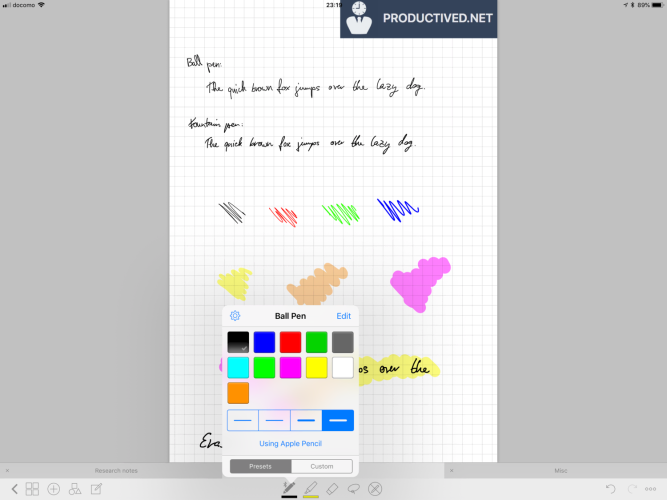
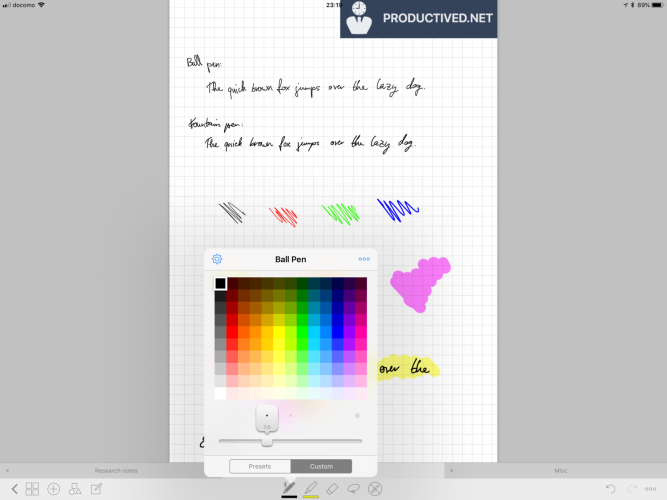
By default, there are presets for 10 colors and 4 thicknesses, but by clicking on the custom button, a much larger number of options are also available. In the options, colors can also be entered as a hexadecimal RGB code.
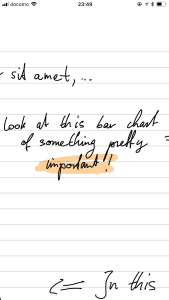
Next to the pencil button, there is a button for highlighters. Similarly, different colors and thicknesses are available. The highlighter will be a transparent coloring in the background of other annotations - much like a text highlighter would work in real life.
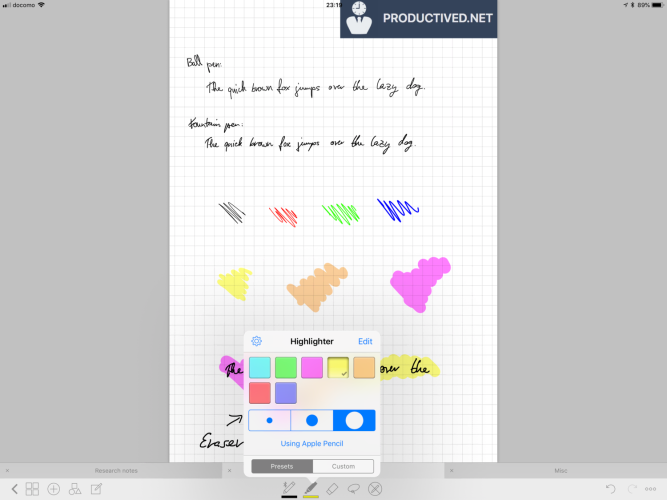
The highlighter works in a way were it colors a layer in the background: Other annotations will stay in the front of the highlights, so they won’t get discolored by using a highlighter on top of them.
Additionally, multiple strokes will blend into each other. They will not get layered and thus won’t get darker with multiple strokes, as you would expect with a real highlighter.
This highlighting behavior is rather unique compared to other apps, but I have grown to like it a lot.
Eraser tool
The last major pen tool is the eraser. It, well, erases previously made annotations. There are three different sizes available. In the options, there are two settings which are in particularly interesting:
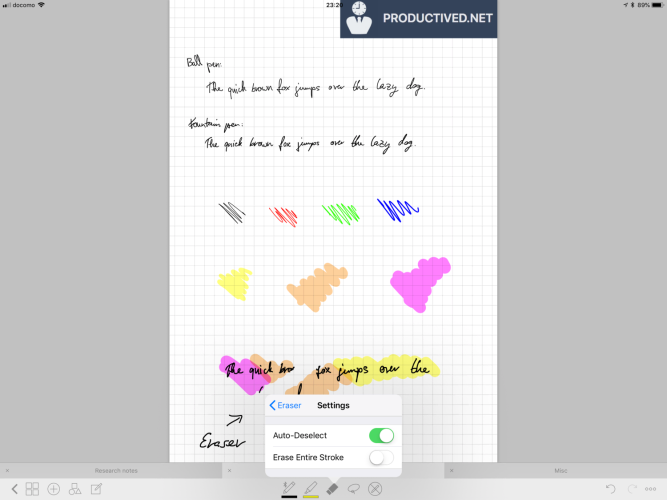
First, you can toggle between erasing full strokes or partial strokes.
Lets say, you write cursive style and have written a long word with a single pen stroke.
The full-stroke eraser would erase the full word by just touching any part of it (as it erases a full written stroke, and you wrote the full word in one go.)
The partial-stroke eraser, on the other hand, would just erase the location where you use it. This could be a single letter in the middle of the word.
To my knowledge, there is no other application where you can toggle this behavior, as most other apps do either one or another.
The second interesting option is auto-deselect. You can set up GoodNotes in a way, that the eraser will only be active for a single stroke. After using the eraser once, the selection will jump back to the last-used pen.
While this behavior definitely takes some time to get used to, it is pretty cool and I use it most of the time. (When you think about it: using the Eraser for correcting a single mistake you just did, and then switching back to the pencil, is almost the standard workflow, isn’t it?)
Selection tool
When the selection tool is active, your pencil will not be able to write anything, but instead can be used select an area by drawing a circle around it. The selected area can then be dragged around. Using this, all annotations can be re-positioned at any time. In my eyes, this is one of the major advantages of writing notes digitally compared to analog.
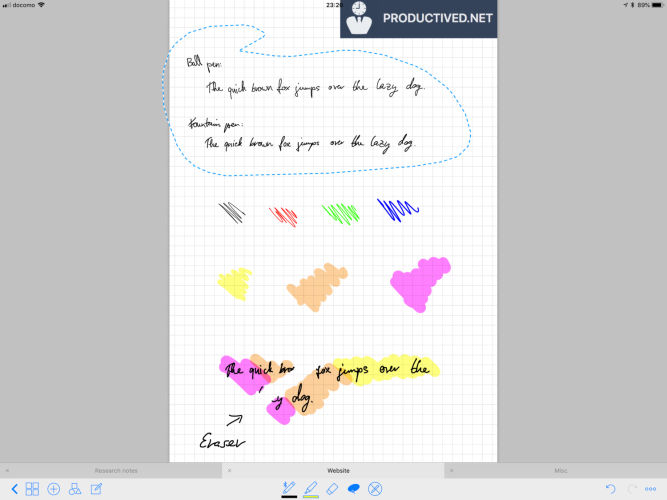
If long-pressing on a selected area, a menu with a couple of extra options pop up.
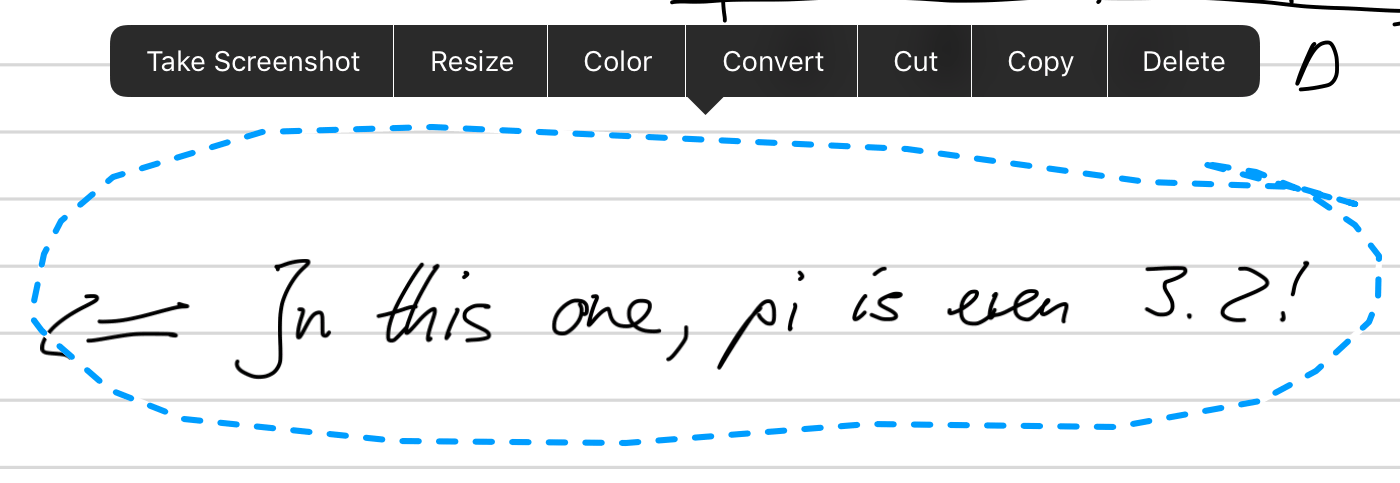
Amid standard options like cut, copy and delete, it is also possible to resize or recolor previous annotations. If doing so, all strokes within the selected area will become a new color, or be stretched to fit the resized area.
The take screenshot button is somewhat special, as it allows you to take a screenshot of the selected area. You could, for example, make a screenshot of a handwritten figure by selecting it and then pressing take screenshot. The screenshot will not contain the rest of the page.
Rest of the menu bar
Quickly going over the rest of the buttons in the main UI bar:

The arrow button will simply bring you back to the overview grid of all available notebooks. The grid button next to it will open a thumbnail grid of all pages in your current notebook. The order of pages can be changed using drag and drop. New pages can also be added. There is also a tab for bookmarks and the PDF outline, if the current notebook consists of imported PDFs.
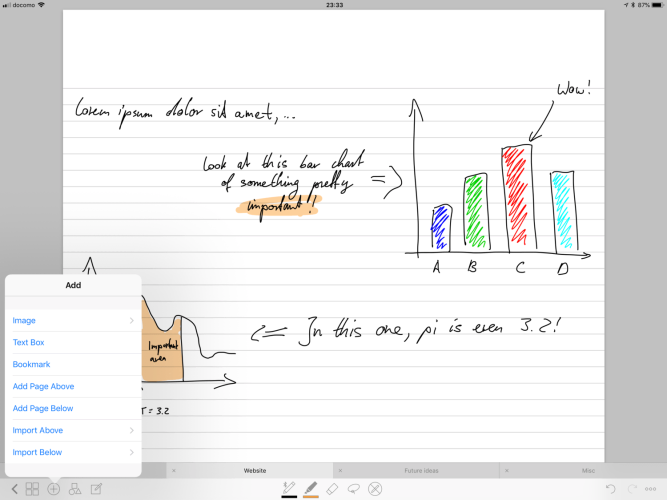
The + button is for importing new pages, images or documents. Imported documents will become new pages, and images can become either a new page or simply a movable element within the current page. Such an imported images can be moved around using the Apple Pencil, and resized as needed. It will become part of the background in a sense that pen annotations and highlighting will always stay on top of them.
Next, there is a shape tool. After toggling this button, the smoothing of the Ink Engine gets much more aggressive and tries to put every stroke into one of the following shapes: A straight line, a circle, a triangle, or a square. This might be handy when drawing figures or graphs. Simply activate this feature and then draw perfectly straight lines for your diagram or a perfect circle for a pie chart. Don’t forget to deactivate this feature when proceeding to write handwritten notes, as it makes your handwriting look pretty funny ;).
The last button on the left is the zoom box. This feature opens a zoomed box in the top or bottom of the screen. It mainly comes from a time where the Apple Pencil was not a thing, so you needed some extra functionality to create meaningful handwritings using the finger or third party styluses. The zoom box still seems to be favored by some, so it is still available in recent versions.
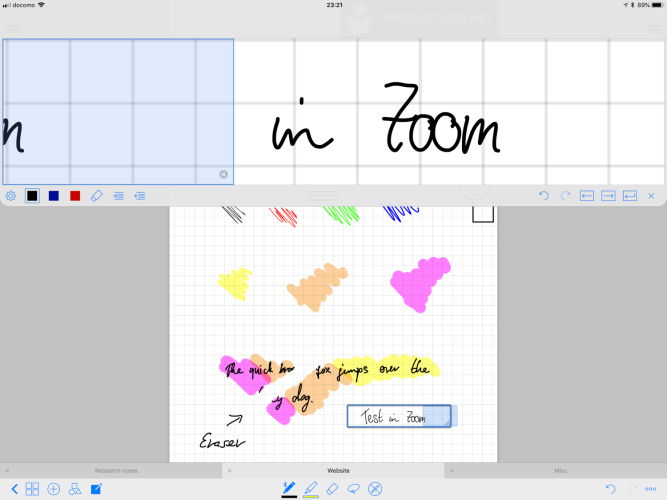
The idea is the following: You write into the zoomed box, which allows you to write bigger, or work completely without pinch-to-zoom. While writing in this box, it will auto-advance when you reach the end of the box. It will also jump to the next line, when you reach the right hand side of the page. Therefore, you can write constantly using your pencil at the exact same spot, without ever needing to scroll or zoom around the page.
All buttons in the middle are the pen annotation features which were covered above. As said before, the Pen tools (Pen, Highlighter, and Eraser) are directly connected to the Apple Pencil: Every input with fingers will translate to scrolling or zooming the page, every input with the Apple Pencil will do pen input or erasing. The most right button in the middle will deactivate this behavior. If it is activated, you can swipe using the pencil.
In the right, there are the undo/redo buttons. Not much to say other than that they can undo or redo strokes. Undo can be used as an alternative to the eraser, if you want to erase the last stroke written. Redo is for, I guess accidental undos?
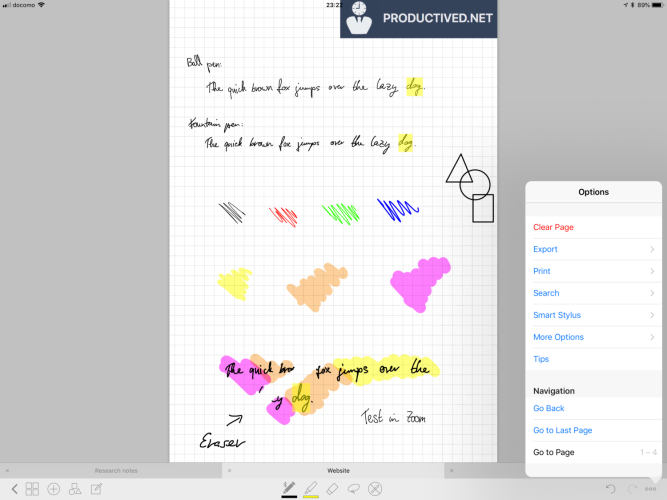
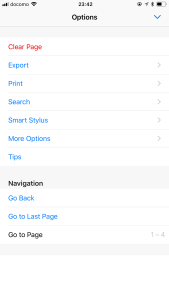
The button with the 3 dots opens a small settings menu to access some options, the search function, and so on.
Ink quality
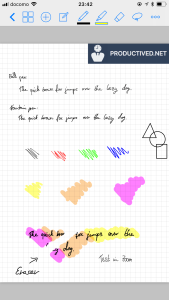
The Inking in GoodNotes is pretty high quality and has almost no delay. Even with the second generation iPad Pro and a 120 Hz screen, the writing is very smooth and fluid.
GoodNotes seems to implement a rather aggressive smoothing of brush strokes. This is a tradeoff: The raw input of the Apple Pencil might have some measurement errors or simply be a bit rough. Developers often apply their own filtering or smoothing to this, to make the handwriting look a bit more appealing to the eye. As different apps use their own implementations for this, many applications have vastly different looking annotations, despite all written with the same hand and/or pencil.
For my handwriting, GoodNotes inking works very well and produces an appearance which comes close to my real handwriting on paper. Unfortunately, reading and watching other reviews, I also found contrasting opinions where GoodNotes seemed to be overly aggressive up to a point where the annotations looked too smooth or artificial.
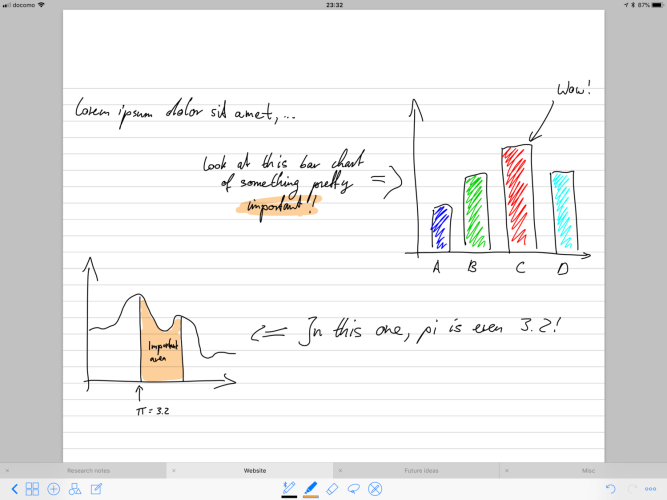
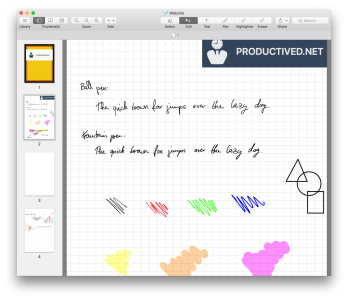
This is a highly subjective matter, so take any opinion with a grain of salt. A result of the inking can be seen in this example document.
Search and OCR
One of my main highlights of the application is the OCR detection. OCR stands for Optical Character Recognition, which is IT speech for a method of visually detecting contents from printed letters or handwritten input.
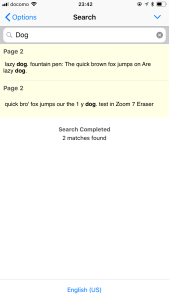
Using such a technology, GoodNotes is capable of searching handwritten documents with a full-text search. With that, you can search for words in your notebooks, just like it would be possible in many other documents like PDFs or Word files.
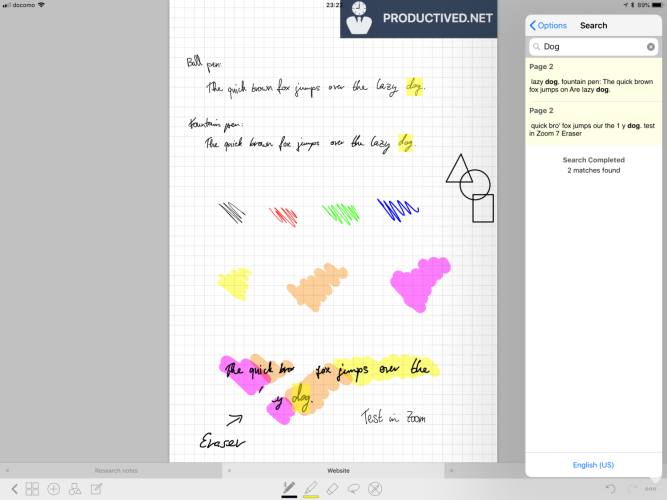
One unfortunate limitation is, that the full-text search only works with the current notebook. If you have dozens of notebooks, there is no option to search over all available notebooks, so you’d need to search them one-by-one.
The handwriting detection is available for a number of languages: English, German, Spanish, French, Italian, Dutch, Japanese, Korean, and both Simple and Traditional Chinese.
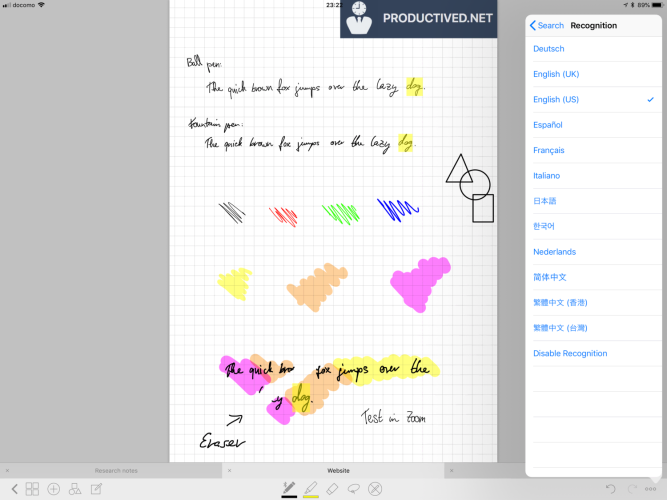
On a side note, the handwriting detection only works for one language at a time. You won’t be able to mix languages in your notebooks (which is a super rare edge case, but I wanted to mention it.)
I did some testing with German and Japanese, which seem to work reasonably well, but for a large majority of the reviewing process I used the English (US) setting.
For my handwriting, which is admittedly nearly unreadable even by most humans, the handwriting detection works incredibly accurate. It has surprisingly few issues even with cursive handwriting. While there are certainly some words here and there which are wrongly detected, the majority of my notes are retrievable with the text search function.
The detected characters are also included into exported documents, so exported PDFs are searchable in any other PDF reader, too.
Converting annotations to text
On top of simply searching and retrieving text passages based on OCR detection, GoodNotes also allows to convert text passages from handwritten to printed letters. Using the lasso tool you can mark a section and then click on Convert. A box will pop-up, which shows you the detected text within the selected handwritten annotation.
Sharing
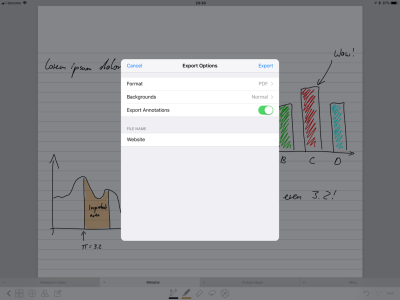
You can export files out of GoodNotes, allowing for sharing of documents and notebooks. Exported documents can be shared as .pdf or .goodnotes.
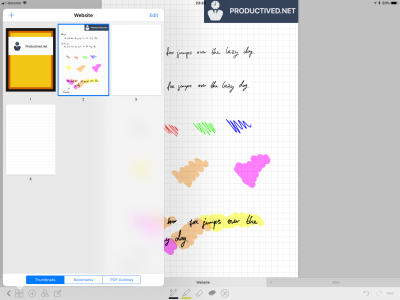
It is possible to either export a full document, that means a full notebook, or a selection of single pages. For exporting multiple pages, you can freely select page thumbnails in the side menu, which will then get part of the exported document. The order of exported pages is the same as in the notebook, but you can skip pages (so, you could for example just export pages 1-2, 5 and 7 of a ten page document, which exports a 4 page PDF).
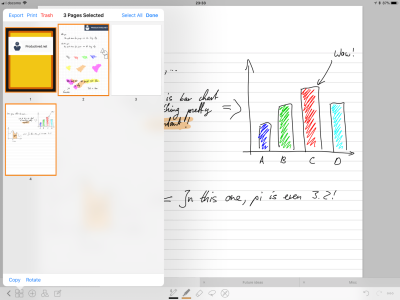
The exported documents also include OCR information, if it is activated. Thus, the handwritings and annotations within the PDF are searchable in other applications like Preview.app on a Mac.
An example of a notebook written and exported from GoodNotes can be downloaded over here.
While exporting to the proprietary format .goodnotes is supported, it might not be the most interesting option, as nobody without the software would be able to open it. Nonetheless, if using this format, the exported file will retain some more information, such as editable annotations. If exporting documents to .pdf, handwritten data and such is flattened. That means, it is somewhat burned into the PDF, and not selectable or erasable anymore, if importing it back into Goodnotes or any other annotation app.
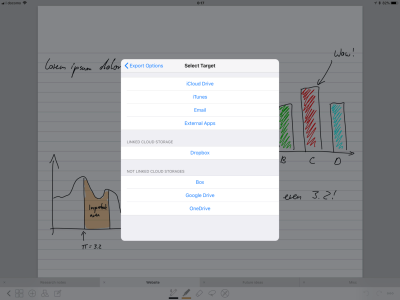
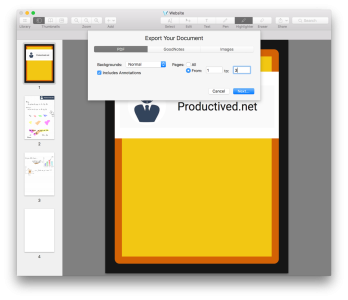
When about to export, there is an options menu, which allows you to customize some settings. You can toggle whether annotations and/or backgrounds are exported. The former option helps with exporting the underlaying PDF as-is without including handwriting. The latter option is interesting for notebooks: You could have a ruled or squared background assisting the handwriting in your notebook, but when exporting, it can get a plain background for printing. If you have a colored background, it also supports to just drop the color information of the background.
While we are on it, one word on printing: Yes, there is a button to allow AirPrint from within the app. It seems to work almost identical to the exporting process, but I have no AirPrint compatible printer to test it out.
After selecting the right options for the export, the standard iOS share extension menu pops up. There, you can simply send the file to any other app, cloud storage, or e-mail.
iPhone app
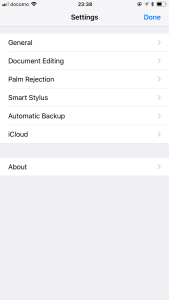
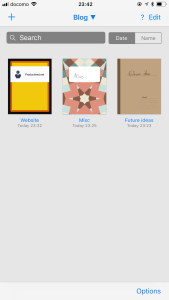
As GoodNotes for iOS is a universal app, it also runs on the iPhone. Both applications are identical, so the iPhone version is just adjusted for the smaller form factor. Keep in mind, that the iPhone does not support the Apple Pencil, so handwritten input might be awkward.
On the other hand, the iPhone version serves as a viewer for notebooks on the go, where you might not have access to your bigger iPad.
Mac companion
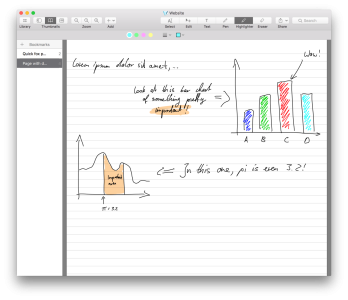
The Mac application can do pretty much the same as the iOS app. This makes sense, as they probably share a large part of code base. The majority of features is the same, although the Mac application being more of a viewer than an editor in terms of how to use it with your notebooks.
Keep in mind, that the current Mac lineup has no support for the Apple Pencil. Therefore, you might hit the editing limits of the app rather sooner than later, as handwriting on a touchpad or using the mouse is, well, awkward. I have no external hardware, like a Wacom tablet or similar, to test whether these would be compatible with the Mac client. A quick Google search gave no results, so they are probably not.
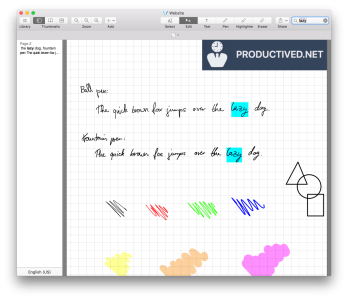
The Mac app can be an excellent viewer for your notebooks, which syncs with the iOS app via iCloud. It also syncs the OCR data, so all handwritings are searchable.
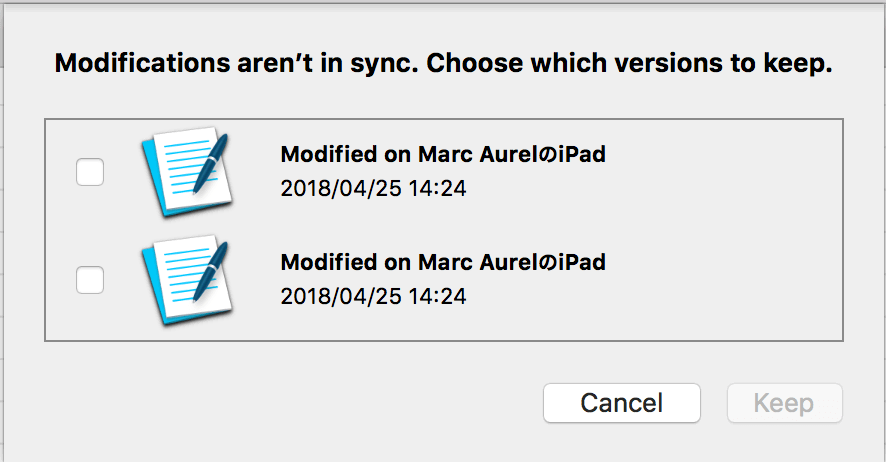
Be aware, to take the syncing with a grain of a salt. It has been reported to be slow, or not syncing at all. I have also been getting some syncing errors from time to time, as this screenshot shows where there are multiple versions which seem identical from its timestamp:
I tested the Mac app with notebooks over a hundred pages and had no severe slowdowns when scrolling and pinch-zooming pages. While it can not compete with the Preview.app’s level of smoothness, its rendering is still pretty smooth.
There is one limitation, which is identical to the iPad, but somehow feels more unnecessary on the Mac than on the iOS version: It is still not possible to search handwritten text in multiple notebooks at the same time. While there is a search box, it only searches the current notebook.
Tip: If wanting to search your whole archive of notes, it might be easier to just export the notebooks to an external application and then search all files at once in there. I use Evernote for that.
For more details, look at the screenshots below. The UI should be fairly self-explanatory. So not much more to say, really. If something is unclear, please ask me in the comments!
Downsides and future wishes
In the following, I will go over a couple of mention-worthy things, where I think that GoodNotes has some flaws or simply hits its limits.
Decide for yourself, whether these are a dealbreaker for you, or not. As GoodNotes is my most used note-taking app, they are not, for me.
Searching OCR over all notebooks
It seems a rather obvious feature, so I am not sure why it is not possible. Currently, the full-text search only searches the current notebook. It would be nice to search all notebooks available, just to make paperless workflows even smoother.
Audio recording features
While it is a feature I would not use myself, I think it is mention-worthy that GoodNotes in its current state does not support any audio recording features. Competitors like Noteshelf 2 and Notability do have it, so if it is something you need, look at these instead.
According to the website of GoodNotes, it is currently considered. Therefore, it might be added to the app in a future update, but no promise on that.
Not best for PDFs
As everything in GoodNotes is a notebook, this results in a weird file management for PDFs. Imported documents become a new notebook, or are included into an existing notebook. Therefore, they are also converted to the new proprietary format of GoodNotes.
The way it currently works, works really well for smaller documents which are OK to be embedded into the notebooks. For example, for lecture slides or meeting notes, it makes sense to include all pages as part of the notebook, maybe surrounded by other pages with handwritten notes.
When importing complete books, on the other hand, the app quickly hits limits. If going over a thousand pages, notebooks tend to be weird to navigate and also result in some performance issues, even with the second generation iPad Pro.
Quality assurance
There have been updates in the past, where the official Twitter account and the App Store changelog read like “Please do not upgrade, hot fix in review.”, because there was a severe bug in the new release. Unfortunately, this has been the case more than once.
This results in a somewhat untrustworthy quality assurance. While the software is in general seems rather robust and stable, app updates from time to time break it. Fortunately, the hot fixes are always quick, so the issues were fixed within a day or so. Still, better in-house testing would be a peace of mind. (Comment: The developer informed me, that “they drastically improved QA processes no matter how minor the changes are.”)
Similarly, there are (were?) a couple of sync issues. Many users on Twitter and in App Store reviews complained about slow syncing speed or no sync happening at all. I had similar issues in the past, which went as far as losing pages and getting duplicate documents. Luckily, most of these bugs seem fixed (for me), but it was a little concerning to say the least. I’d advise to keep regular backups or export notebooks to another app after finishing them.
GoodNotes 5 is also on the horizon for at least a couple of years. It has been in internal testing for a long time, so that is probably why GoodNotes does not get as much development resources as it used to. Hopefully, the developer surprises us with a great next major release soon.
There has been no word on whether the upgrade is paid or not, so this might be a slight gamble. Then again, GoodNotes 4 is a powerful piece of software which is worth its money, even if the upgrade might need more dollars.
Conclusion
GoodNotes is one of the best note taking applications on the market and a definitive recommendation.
The OCR capabilities create easily searchable documents, which is also available in exported documents. Therefore, even documents archived to other applications can be easily searchable everywhere.
The core functionality of the Ink Engine is pretty advanced and includes everything needed. There are many options to customize the pens, highlighters and erasers - more than in competing applications. With the Mac application, GoodNotes provides some kind of companion app for viewing and searching notebooks on the Mac.
One of things mention-worthy is the lack of audio recording. While not a crucial feature in a note-taking application, it is prominent in many competing applications like Noteshelf 2 and Notability.
All-in-all, GoodNotes is a solid buy and the main application I use for my handwritten notebooks almost every day.
Pro
- Implicit OCR and full-text search of all handwritten texts in lots of languages.
- Smooth Ink Engine with lots of extra features.
- Many features for exporting, including the OCR data.
Contra
- Not best for PDF as it is mainly for notebooks.
- No Audio recoding features like competitors.
- Regular bugs with sync and weak quality assurance.
Summary of GoodNotes 4
Handwritten detection in many languages which is even exportable. Smooth inking engine with many features.
No audio recording features. Slow development.
Free for restricted feature set, $7.99 for full unlock
Tested platforms: macOS iPadOS iOS
This review tested the following versions: iPadOS: 4.12.13, macOS: 1.1.15.

Screenshots


Disclosure: This post may contain affiliate links. This means I may make a small commission if you make a purchase.
About me
Dr. Marc A. Kastner
I am an assistant professor working on computer vision and multimodal understanding. I am interested in task- and knowledge management. In my free time, I blog on productivity workflows and apps.
For my professional portfolio, please visit: marc-kastner.com
See Also
Flexcil
Flexcil is an underdog in the group of annotation apps for the iPad. While rather new, it comes with some novel approach and fresh wind. …
Read More...Notability
When going digitally with your paperless workflows and the Apple Pencil, the need for a great note-taking tool comes pretty soon. The …
Read More...Noteshelf 2
One of many usages of the iPad for productivity is the use of the Apple Pencil to take handwritten notes. Whether in meetings, lectures, or …
Read More...